|
 How to perform super high accuracy end-scans using an end target.
|

|
Why the End-Scan technique is important
The quick End-Scan Using the Scissor Motion technique is not always precisely repeatable if you use any of the AUTO exposure settings to set the LASER exposure in real-time. The reason is that as he laser drops off the end of the tube, the automatic exposure feature impacts which of the points are kept where the tube drops off (at the end).
The solution to this issue is to use the End-Scan Using the End Wall technique - which works well for tubes that have end-walls that are easy to aim at - AND end-walls that are not highly reflective with deformations like burrs.
For tubes that don't qualify for either of the above techniques, we recommend end targets for ultra-precise measurements.
Apply the Target
|
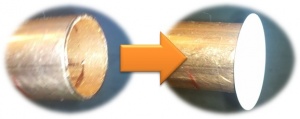
- The image at the right shows the end of a copper tube with a sharp burr and a highly reflective end-wall. It is very difficult to aim the laser at this end wall and ensure no outliers at the same time.
- The solution is to use white targets on the end of the tubes. The example here shows white poly labels that measure at 0.004" thick and provide an excellent flat target for the laser.
(Note: Use the Plane-Point measurement in the built-in computer of the FARO Edge to confirm the thickness of the target.)
- Any shape of target works well as long as it is LARGER than the diameter of the tube. Apply the target so that none of the end-wall can be scanned by the laser.
|
|
|
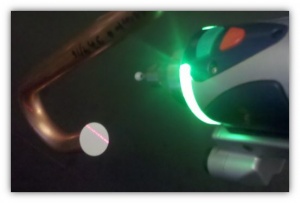
- To use the target, aim the laser at the target so that it strikes the target as perpendicular to the surface as possible. Avoid returning any points other than the target.
- Hold the laser still when collecting the stripes across the target.
- Consistently place the line across the same area of the target from measure to measure.
|
|
|
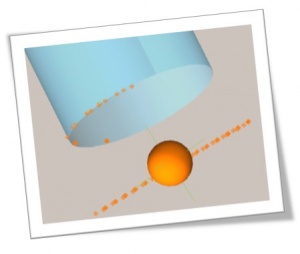
- The resulting geometry on the screen should appear like the image at he right.
- The end point generated on the screen should perfectly coincide with the stripes.
|
|


