Difference between revisions of "Hardware Key Driver Installation - Command Line Version"
From ATTWiki
(→STEP 4 - Browse to the folder created and run the installation) |
(→STEP 5 - Allow the hardware driver to install) |
||
| Line 30: | Line 30: | ||
This is the dialog you will see:<br><br> | This is the dialog you will see:<br><br> | ||
[[image:hasp4pleasewait.jpg]]<br><br> | [[image:hasp4pleasewait.jpg]]<br><br> | ||
| + | |||
| + | |||
| + | ==STEP 6 - Close the installation == | ||
| + | |||
| + | This is the dialog you will see if the installation is a success:<br><br> | ||
| + | [[image:hasp4cmdsuccess.jpg]]<br><br> | ||
==Other Pages== | ==Other Pages== | ||
[[Hardware Key]] | [[Hardware Key]] | ||
Revision as of 00:07, 7 July 2010
To install this version of the hardware key driver, follow these steps:
STEP 1 - Download the Driver
http://www.advancedtubular.com/key/Hinstall.zip
STEP 2 - Extract the folder with files to an easy to find location
For example, the zip file contains a folder named HASP4_driver_cmdline:

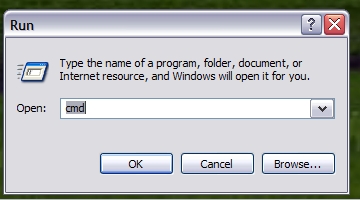
STEP 3 - Use START, RUN, to run the CMD command
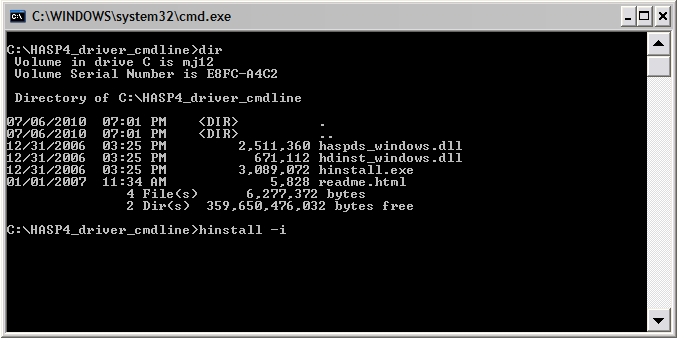
STEP 4 - Browse to the folder created and run the installation
STEP 5 - Allow the hardware driver to install
This is the dialog you will see:

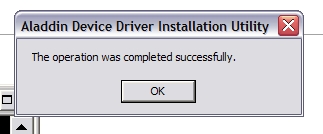
STEP 6 - Close the installation
This is the dialog you will see if the installation is a success:


