Difference between revisions of "VTube End Length Offsets"
(→How End Offsets Work in VTube) |
(→Other Pages) |
||
| (39 intermediate revisions by one user not shown) | |||
| Line 2: | Line 2: | ||
<tr cellpadding=10> | <tr cellpadding=10> | ||
<td width=300> | <td width=300> | ||
| − | [[image:vtube- | + | [[image:vtube-laser_logo_1.96.png|300px]]<br> |
| − | [[image:vtube- | + | [[image:vtube-step_logo_2.png|300px]] |
*Back to [[VTube-LASER]] | *Back to [[VTube-LASER]] | ||
*Back to [[VTube-STEP]] | *Back to [[VTube-STEP]] | ||
| Line 9: | Line 9: | ||
</td> | </td> | ||
<td width=300> | <td width=300> | ||
| − | [[image: | + | [[image:vtl_screen_hd_scanner_without_logo.png|400px]] |
</td> | </td> | ||
</tr> | </tr> | ||
| Line 15: | Line 15: | ||
<br> | <br> | ||
| − | + | __NOTOC__ | |
| + | ==What Are End Length Adjustments?== | ||
| + | <table> | ||
| + | <tr> | ||
| + | <td width=300> | ||
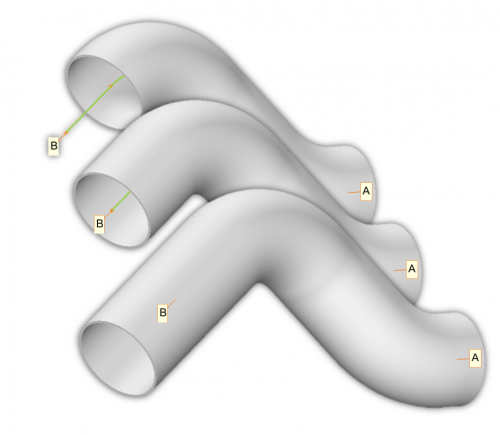
| + | Customers often need a way to adjust the material length on the end of the tube without changing the end point location.<br><br> | ||
| + | |||
| + | This is possible with the A End Length Adjustment and B End Length Adjustment values in Part Setup in both [[VTube-STEP]] and [[VTube-LASER]]. | ||
| + | <br><br> | ||
| + | Here are some facts about end length adjustments in VTube:<br><br> | ||
| + | |||
| + | # Use end length adjustments to adjust the material length of the tube without moving the actual end point.<br><br> | ||
| + | # Use this to add material for end forms and other operations that require extra material.<br><br> | ||
| + | # These offsets will be added into the calculated Cut Length in the Part Setup menu.<br><br> | ||
| + | # These offsets are displayed in the model on the screen.<br><br> | ||
| + | # These offsets are displayed in the Length data in the LRA bender charts.<br><br> | ||
| + | # The offsets have an immediate real-time effect on all parts of VTube.<br><br> | ||
| + | |||
| + | <br><br> | ||
| + | </td> | ||
| + | <td width=500> | ||
| + | [[image:vtube-endlength_offsets_comparison.png|500px]]<br><br> | ||
| + | [[image:vtube-endlength_offsets_in_lra.png|500px]] | ||
| + | </td> | ||
| + | </tr> | ||
| + | </table> | ||
| − | == | + | ==End Length Offsets Add or Subtract Material Length== |
<table cellpadding=10> | <table cellpadding=10> | ||
<tr valign=top> | <tr valign=top> | ||
<td width=300> | <td width=300> | ||
| − | + | The end offsets in the Part Setup menu add or subtract material the ends in real-time. | |
| − | The end offsets in the Part Setup menu | + | |
<br><br> | <br><br> | ||
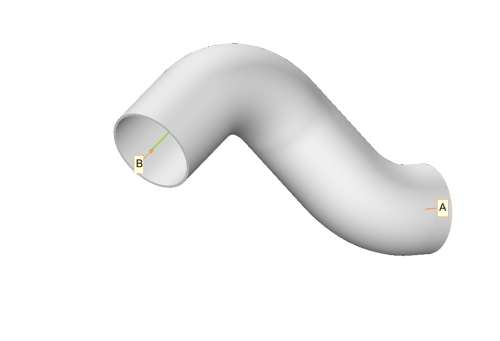
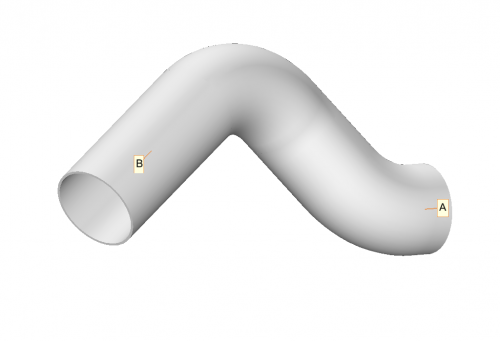
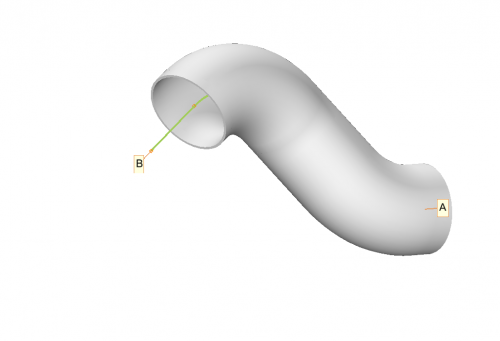
This is the starting tube with no A End or B End offsets. | This is the starting tube with no A End or B End offsets. | ||
| Line 32: | Line 56: | ||
</td> | </td> | ||
</tr> | </tr> | ||
| + | </table> | ||
| + | ====Entering a Positive Length Offset in the Part Setup Menu==== | ||
| + | <table> | ||
<tr valign=top> | <tr valign=top> | ||
<td width=300> | <td width=300> | ||
| − | + | ||
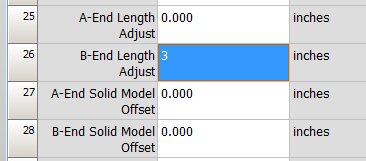
We can change the B End Offset in the Part Setup menu like this:<br><br> | We can change the B End Offset in the Part Setup menu like this:<br><br> | ||
[[image:vtube-offsetdemo_offset_b_end_3inches.png]]<br><br> | [[image:vtube-offsetdemo_offset_b_end_3inches.png]]<br><br> | ||
| Line 44: | Line 71: | ||
</td> | </td> | ||
</tr> | </tr> | ||
| + | </table> | ||
| + | ====Using Transparency to Show the Effect==== | ||
| + | <table> | ||
<tr valign=top> | <tr valign=top> | ||
<td width=300> | <td width=300> | ||
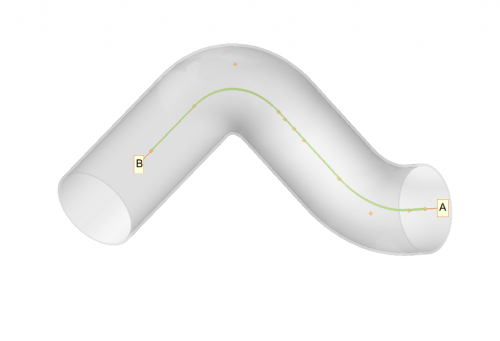
| − | + | Here is the result with transparency increased to 0.75.<br><br> | |
| − | Here is the result with transparency increased to 0.75 | + | With the transparency it's easy to see that the end point never moved.<br><br> |
| + | </td> | ||
<td width=300> | <td width=300> | ||
[[image:vtube-offsetdemo_offset_b_end_3inches_model2.png|500px]] | [[image:vtube-offsetdemo_offset_b_end_3inches_model2.png|500px]] | ||
</td> | </td> | ||
</tr> | </tr> | ||
| + | </table> | ||
| + | ====Entering a Negative Length Offset in the Part Setup Menu==== | ||
| + | <table> | ||
| + | <tr valign=top> | ||
| + | <td width=300> | ||
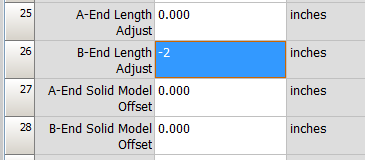
| + | You can also subtract material from an end by using a negative value like this:<br><br> | ||
| + | [[image:vtube-offsetdemo_offset_b_end_minus2inches.png]]<br><br> | ||
| + | Then press F2 to refresh the graphics, and B end material is made shorter without moving the end point. | ||
| + | </td> | ||
| + | <td width=300> | ||
| + | [[image:vtube-offsetdemo_offset_b_end_3inches_model3.png|500px]] | ||
| + | </td> | ||
| + | </tr> | ||
| + | </table> | ||
| + | ==Length Offsets Change the Calculated Cut Lengths== | ||
| + | <table> | ||
| + | <tr valign=top> | ||
| + | <td width=300> | ||
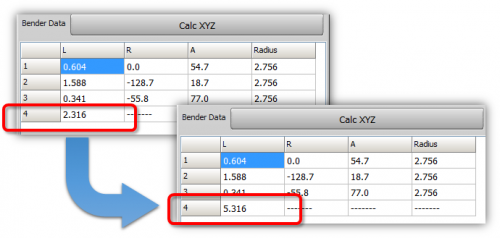
| + | The Cut Length in VTube is a static value that can be calculated using a popup menu in the Part Setup grid.<br><br> | ||
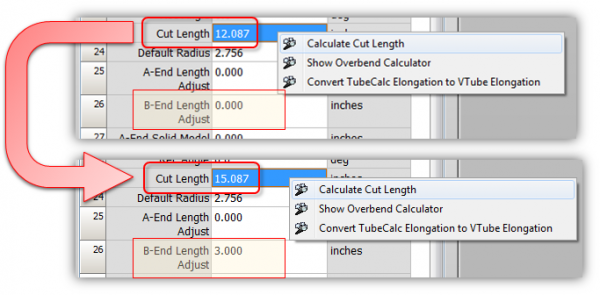
| + | During calculation, it will take into account the End Length Offsets to calculate a cut length.<br><br> | ||
| + | * The first grid shows an offset of zero. | ||
| + | * The second grid shows a B End Length offset of +3. | ||
| + | * See how the offset of 3 is added into the cut length when you recalculate the cut length.</td> | ||
| + | <td width=300> | ||
| + | [[image:vtube-endlength-calc_cut_length_compare.png|600px]]<br><br> | ||
| + | </td> | ||
| + | </tr> | ||
</table> | </table> | ||
| + | |||
| + | <br><br> | ||
==Other Pages== | ==Other Pages== | ||
| + | * About [[VTube-LASER End Point Deviations]] | ||
| + | * [[What are Centerline Tangent Points and Why Are They Important in VTube-LASER?]] | ||
| + | * About [[VTube Intersection Point Tolerances]] | ||
| + | * [[The Limitations of Qualifying Tube Shapes using Bender Data]] | ||
| + | * Back to [[VTube-STEP]] | ||
* Back to [[VTube-LASER]] | * Back to [[VTube-LASER]] | ||
Latest revision as of 20:03, 10 January 2017
|
What Are End Length Adjustments?
|
Customers often need a way to adjust the material length on the end of the tube without changing the end point location. This is possible with the A End Length Adjustment and B End Length Adjustment values in Part Setup in both VTube-STEP and VTube-LASER.
|
End Length Offsets Add or Subtract Material Length
|
The end offsets in the Part Setup menu add or subtract material the ends in real-time.
|
Entering a Positive Length Offset in the Part Setup Menu
|
We can change the B End Offset in the Part Setup menu like this: |
Using Transparency to Show the Effect
|
Here is the result with transparency increased to 0.75. |
Entering a Negative Length Offset in the Part Setup Menu
|
You can also subtract material from an end by using a negative value like this: |
Length Offsets Change the Calculated Cut Lengths
|
The Cut Length in VTube is a static value that can be calculated using a popup menu in the Part Setup grid.
|


