Difference between revisions of "The Limitations of Qualifying Tube Shapes using Bender Data"

From ATTWiki
Jump to: navigation, search
(The Best Data for Qualification)
Line 106: Line 106:
 
<tr valign=top>
 
<tr valign=top>
 
<td width=500>
 
<td width=500>
The best data for qualification is the Inspection data TANGENTS grid both in the Inspection Data menu and in the Reports menu. <br><br>
+
The best data for qualification is centerline TANGENT POINT and MIDPOINT data in the Inspection Data menu and in the Reports menu. <br><br>
 
[[image:vtube-laser-t1d-mp-t2d-image1.png|500px]]
 
[[image:vtube-laser-t1d-mp-t2d-image1.png|500px]]
  

Revision as of 19:46, 10 January 2017

Vtube-laser logo 1.96.png This page explains the major limitations of using bender data for qualifying tube shapes.

Vtl screen hd scanner without logo.png


Contents

What is Bender Data?

Bender data is the data used to setup tube bending machines. Usually, bender data has at three major columns of data - the LENGTH between bends, ROTATION planes between bends, and BEND ANGLE columns. These columns can be used to define the shape of a tube and setup a tube bender.

The three columns are referred to in many different ways by different bender manufacturers and software developers.

  • "LRA" or "LENGTH, ROTATION, ANGLE" = VTube and Supravision

  • "YBC" = Eaton Leonard Standard Axes, BendPro Controls

  • "PRB" = MiiC

  • "FRB" or FEED, ROTATE, BEND = CNC Bender ProControl for SMT

  • "XYZ" = Pedrazzoli, BLM

  • "FPB" = Chiyoda, KEINS, and COMCO

VTube-LASER Master LRA Data.png

CNCBenderFRBpage.jpg

The Limitations of Bender Data for Qualifying Tube Shapes

The tube fabrication industry rarely uses bender data to qualify part shapes because doing that requires the use of angles in the qualification.

There is the major problem with using angles for qualification of tube shapes: Properly qualifying tube shapes with the angules in the bend data is a process that is always dependent on the magnitude of the lengths between bends.

Illustration of the Limitation

Look at the bender data on the right. The two sets are not the same because I've made the MEASURED rotations to be exactly one degree off of the nominal or MASTER data.

Try to answer this question: Given a tolerance envelope of 0.1", does this part qualify or not?

VTL compare master and measured LRA.png


Visually Demonstrate the Problem of Qualifying with Angles

Unless you can perform 3D trigonometry mentally on-the-fly, the answer to the question above isn't obvious. Even if we guess the answer, we can not accurately guess at what tolerance envelope value the part would be considered acceptable.

It's easy to visually demonstrate the limitation of using bender data to tell us if a part shape falls within the tolerance envelope.

Compare the two similar parts and their alignments. The image on the right is from the alignment of the two tubes from the LRA data shown in the report above. The white tube is the MASTER. The pink tube is the measured. The blue transparent cylinders that surround the tube are the TOLERANCE ENVELOPES. The tube shape must be within each straight's tolerance envelope to be considered a good shape - or a shape that qualifies.

This first part has 4 inch straights for every straight. (See the LRA data above.)

All the centerlines fall within within the tolerance envelope. The "T1 dev" column values are TANGENT 1 DEVIATIONS, and the "T2 dev" column values are TANGENT 2 DEVIATIONS.

The tangent points are where the straights meet the bend arcs along the centerline.

VTL image 4 inch straights.png


This second alignment image shows the part with IDENTICAL ANGLES - but the two middle straights are lengthened to 10 inches between bends.

You can see red cells in the Tangent point/Mid point grid, and yellow tolerance envelopes where the pink is breaking through.

The part is no longer within tolerance - even though all the angle deviations are identical between the two parts.

VTL image 4 inch and 10 inch straights.png

The Best Data for Qualification

The best data for qualification is centerline TANGENT POINT and MIDPOINT data in the Inspection Data menu and in the Reports menu.

Vtube-laser-t1d-mp-t2d-image1.png

Vtube-laser-tangent-report.png

How to Understand the Tangent Data

The image on the right shows the visual representation of the chart and report above. The deviations in the grid match the part in the image. The part is made transparent so that you can see the two centerlines inside the tube. (It's easy to make parts transparent by setting the transparency value about 0.75 inside the Parametric Tube control menu under Models.)

In the image below shows how the distance T1d is measured in the second straight:
Vtube-laser-t1d-illustrated.png


In this case, the T1d value is 0.9mm for straight 2.

How to Understand the End Point Deviations

Automatic Internal Trimming of End Points for Shape

Even though the end points are not tangents, we can still use them in the chart because they qualify the part the same way that tangent points do.

A key in understanding the T1d of straight one and the T2d of the last straight is to remember that the deviation is not the same as how long or short the straights are relative to the master tube shape. See the illustration on the right to understand why.

The MASTER to MEASURED end point deviation in the Tangent grid is 1.9mm. The measurement is the distance between the two lines at the corresponding end points - as if the MEASURED WERE TRIMMED.

(The Measured part is the pink part. The Master part is white.)

Vtube-laser-t1d-end1.png

Untrimmed End Points for Lengths

However, the end length is 90.2mm too long.

In this application, the customer bent the part 90mm too long on purpose in order to give the bend arm clamp die enough material on the first straight to grip.

Notice that, even though the part is significantly too long, the BEST FIT algorithm didn't use the actual measured end point in the alignment. The alignment was based on the trimmed point on the measured centerline that was nearest the master end point.

So, in this case the part shape in space is qualified - but it needs trimming by 90.2mm to also qualify the end length (another critical qualifier).

Vtube-laser-endlength.png


Typical Industry Tangent Point Tolerances

In working with thousands of customers over the past few decades, we've seen some trends in accepted envelope deviation tolerances. Here are what we commonly see:

Aerospace and Automative Fluid Lines

Diameter Range

Envelope Tolerance

12.7 mm (0.5 inch) diameter tubes or less

+/- 1 mm (0.039 inches)

Greater than 12.7 mm (0.5 inch)

+/- 2 mm (0.078 inches)

Automotive Exhaust Pipes

Diameter Range

Envelope Tolerance

50 mm to 76 mm

From +/- 2 mm to +/- 3 mm

76 mm to 102 mm

+/- 3 mm

Larger then 102 mm

+/- 3 mm or greater

Shipbuilding

Diameter Range

Envelope Tolerance

All Diameters

+/- 6 mm


HVAC

Diameter Range

Envelope Tolerance

All Diameters

+/- 2 to +/- 3 mm

Structural Tubes (Frames)

Diameter Range

Envelope Tolerance

All Diameters

+/- 2 to +/- 3 mm

Tighter Tolerances

Sometimes customers will required +/-0.75 mm - but this is very rare. We've never seen tube shapes that must be qualified with a deviation tolerance of less than +/- 0.75 mm.

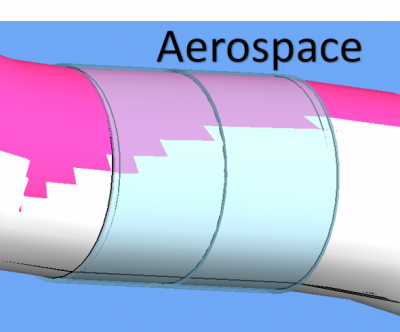
Aerospace envelope tolerance.png
Exhaust envelope tolerance.png
Shipbuilding envelope tolerance.png

Other Pages