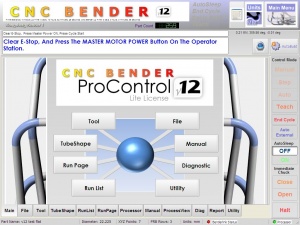
Difference between revisions of "CNC Bender v12-20100105"
From ATTWiki
| Line 34: | Line 34: | ||
* This is an overview of how to use teach-mode:<br><br> | * This is an overview of how to use teach-mode:<br><br> | ||
| − | ** Enable Teach Mode inside the options list for bend 1. (See | + | ** Enable Teach Mode inside the options list for bend 1. (See Screen 1)<br><br> |
** Power on and Cycle Start the bender<br><br> | ** Power on and Cycle Start the bender<br><br> | ||
** Press AUTO mode.<br><br> | ** Press AUTO mode.<br><br> | ||
| − | ** Activate the Teach button in the Control Mode bar.<br><br> | + | ** Activate the Teach button in the Control Mode bar. (See Screen 2)<br><br> |
** Load and bend the part<br><br> | ** Load and bend the part<br><br> | ||
| − | ** After bend 1 is finished, the dies will open, and CNC Bender will enter STEP mode, and display the Teach Mode menu. | + | ** After bend 1 is finished, the dies will open, and CNC Bender will enter STEP mode, and display the Teach Mode menu. (See Screen 3)<br><br> |
| − | ** Teach the bender up to 10 Custom Commands - each command can contain any number of simultaneous jog motions. | + | ** Teach the bender up to 10 Custom Commands - each command can contain any number of simultaneous jog motions. (See Screen 4)<br><br> |
** Exit the Teach Mode window and finish bending the part.<br><br> | ** Exit the Teach Mode window and finish bending the part.<br><br> | ||
| − | * Other things to know: | + | * Other things to know about the new Teach Mode: |
** Teach in '''PreBend''' immediately after you chuck the part and press the run buttons.<br><br> | ** Teach in '''PreBend''' immediately after you chuck the part and press the run buttons.<br><br> | ||
** Control extra moves in '''PostBend''' using the final bend's Custom Commands.<br><br> | ** Control extra moves in '''PostBend''' using the final bend's Custom Commands.<br><br> | ||
| Line 51: | Line 51: | ||
<td> | <td> | ||
| − | [[image:cncv12_teachmode_optionenable.jpg|300px|thumb|Enable Teach Mode individually for each bend]]<br><br> | + | [[image:cncv12_teachmode_optionenable.jpg|300px|thumb|Screen 1: Enable Teach Mode individually for each bend]]<br><br> |
| − | [[image:cncv12_runpage_teachbutton.jpg|300px|thumb|New TEACH speed button in the Control Mode bar]]<br><br> | + | [[image:cncv12_runpage_teachbutton.jpg|300px|thumb|Screen 2: New TEACH speed button in the Control Mode bar]]<br><br> |
| − | [[image:v12teachmodemenu.jpg|300px|thumb|Teach Mode activates after a Teach Mode Section was encountered during bending]]<br><br> | + | [[image:v12teachmodemenu.jpg|300px|thumb|Screen 3: Teach Mode activates after a Teach Mode Section was encountered during bending]]<br><br> |
| − | [[image:v12customcommandeditor_teachmode.jpg|300px|thumb|Custom Command Editor during Teach Mode]]<br><br> | + | [[image:v12customcommandeditor_teachmode.jpg|300px|thumb|Screen 4: Custom Command Editor during Teach Mode]]<br><br> |
</td> | </td> | ||
Revision as of 17:11, 18 January 2010
|
Contents |
 NEW - TEACH MODE
|
CNC Bender can now learn from you during setup. Teach the bender any motion for difficult transitions between bends
|
|
 NEW - CUSTOM COMMANDS
|
|
|
|
Other Pages
- Back to CNC Bender
- Back to CNC Bender Software Updates
- See CNC Bender General Information
- See Final Feed Clearance


