VTube-LASER v2.6
|
Revision 2.6 Build 130Release Date: July 27, 2016
|
 ENHANCED - THE CUT PLANE FEATURE WAS COMPLETELY REDESIGNED
This release is all about CUT PLANES. So if you use cut planes to automatically removed points behind or around the tube, then this a very big release for you. If you have to measure tube assemblies with tubes near each other, then you will want to learn this version. If you measure tubes or wires that bend back on themselves, then this release is very important for you.
Here are the big items in this release:
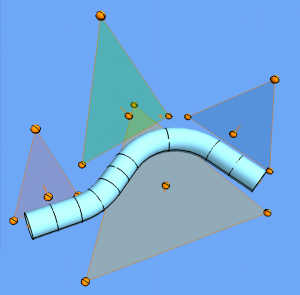
1 - Use any number of MULTIPLE CUT PLANES simultaneously.
The new Cut Plane Setup Control window can be opened at any time to control any number of multiple cut planes simultaneously.

2 - CUT PLANES can now be measured ON-THE-FLY during any tube measurement.
In previous versions, the CUT PLANE measurement had to be performed before you started measuring the tube. Now you can measure new cut planes even if you are in the middle of measuring a tube - then continue where you left off after you measure a new Cut Plane.
3 - CUT PLANES can be made ACTIVE or INACTIVE at any time
The ACTIVE check boxes in the Cut Plane List let you switch them on or off at any time.
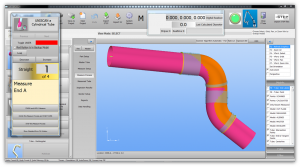
4 - The DRO (Digital Readout) shows if the scan is below the Cut Plane before you scan
Have you ever wondered why the arm wasn't measuring, only to find out that you were below the cut plane? This will give you a clear indication if you are below the cut plane - BEFORE you press the green button
5 - CUT PLANE setups are now stored in project files
Because of this new feature, a new dialog appears when you are changing projects. This gives you the flexibility of choosing to keep the current setup, or to load the setup inside the project file.
6 - The CUT PLANE setup can be exported and imported using XML files
- VTube can now export and import entire CUT PLANE setups using the XML file format.
- VTube uses XML files to store the Cut Plane setup automatically between shut down and switch on. So you no longer have to worry about losing the current Cut Plane setup when you close VTube. VTube will automatically store it for you for use in future measuring sessions. This is ideal for a majority of our customers that never change the arm or the measuring table in relationship to each other.
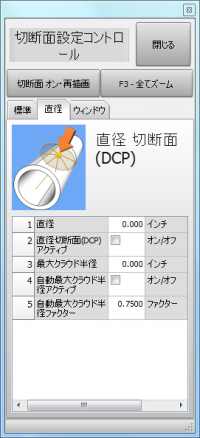
7 - NEW INNOVATION for Measuring Parts In Densely Packed Areas: DIAMETER CUT PLANES
Measure Across Several Diameters - VTube will find the correct straight

This new feature lets you scan across several diameters or objects of any kind - and still AUTOMATICALLY find only the diameter you want to keep.
AIM Inc. - Wirebending Applications
The feature was developed to solve a need that we encountered at AIM Inc. when measuring wire bent parts. The orange part shown below is a sample test piece that is formed from 0.2 inch diameter wire. When measuring this part the FARO scanner stripe often crosses four straights at the same time.
Illustration of the Issue
Imagine the HD (blue) laser stripe measuring one of these four straights. In order to measure one, it is very hard to orient the beam in a way that avoids the three straights you don't intend to measure. This is the easy way to measure one of these four straights:

However, touching four straights at the same time will not allow VTube to calculate a centerline of any one of these straights - unless you use the DCP feature. The DCP feature follows some simple rules to allow VTube to sort out and select the one straight that you intend to measure - every time.
It works great on tube assemblies too - like headers for multiple tubes close to each other, and HVAC assemblies where tubes pass close to objects like evaporators.
Tutorials On How DCP Works
- See the tutorial on DCP - Diameter Cut Planes
- See How to Measure Tubes Attached to an Evaporator with the DCP Feature
 ENHANCED - Smarter Scanned Point Cloud Display for FAST Redraw Speed
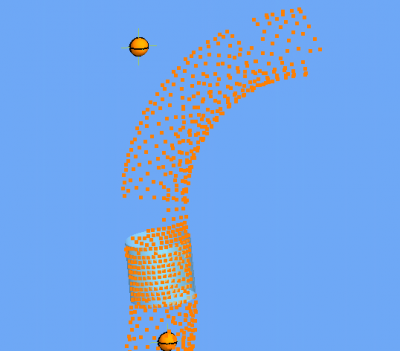
Why This Feature Was NeededThe issue is that VTube can handle extremely dense point clouds internally (in memory) - but graphics cards cannot keep up with the increased load from the new Bend Profile feature. So we changed VTube to automatically limit the number of points displayed on the screen. Goals for Calculation of Point Cloud Density for Display in VTubeGoal 1: VTube needs to display points quickly on the screen. |
|
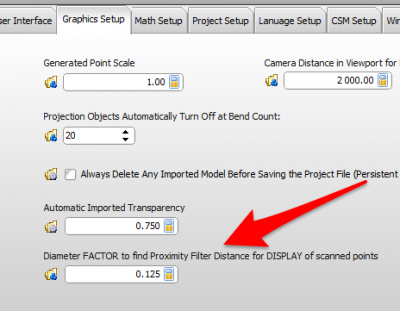
How it WorksIn order to better anticipate how to draw dense point clouds, VTube has this new field in the System Options / Graphics Setup Tab. It is Not Used in End ScansThis feature has no impact on END SCANS. End scan point clouds are always display no closer than 0.005" (.12 mm) - regardless of the diameter. |
Other Changes
|
These language files were updated:
|
Debug v2.6 Build 126
- Build 125 did not use DCP for the OUT DIAMETER measure processes. (DCP always worked in the Tube Measure - Cylinder process worked.) This is corrected in Build 126.
Debug v2.6 Build 127
- We fixed the Cut Plane measure dialog so that it changes point numbers when you move to the next point.
- VTube automatically switches the new cut plane to ACTIVE - but didn't update the checkbox in the model menu on the right with a check. This has been corrected.
Changes v2.6 Build 130
- We changed the report template engine so that it can handle extra spaces in tag fields.
- We added the "Stay On Top" checkbox option to the Report window. This value is saved in the persistent configuration file.
Other Pages
- Back to VTube-LASER
- Back to VTube Software Updates (for LASER Mode)
- See also VTube-STEP
- See also VTube-STEP Revisions
- See VTube-LASER Customer Support Page to download the latest version.
- See the tutorial on DCP - Diameter Cut Planes
- See How to Measure Tubes Attached to an Evaporator with the DCP Feature

