Ball Probe Setup
From ATTWiki
|
How to Change the Default Ball Probe Setup
The default ball probe setup is always controlled by the FARO drivers and dialogs. The FARO driver dialog windows can be loaded from inside VTube-LASER while VTube is connected to the arm. To change the default ball probe, you will need to access the FARO dialog and choose the correct probe.
You must be connected to a FARO arm to perform these steps.
STEP 1In VTube-LASER click on the Arm Utilities button in the Arm tab inside the Measure Setup menu. |
|
STEP 2Press Probe Setup and Calibration. |
|
STEP 3Select the correct ball probe then press OK. |
|
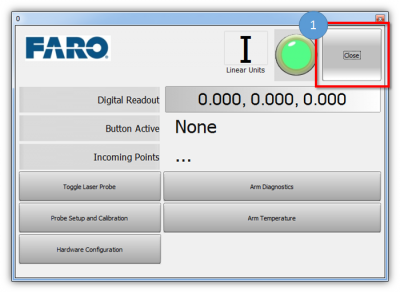
STEP 4Press the Close button in the FARO Arm Utilities window. |
|
STEP 5Observe that the new ball probe selection will appear in the Arm grid. |
Other Pages
- Back to the VTube-LASER page


