Difference between revisions of "Using a Datum to Get Print Dimensions"
(Created page with "<table> <tr cellpadding=10> <td width=225> 300px ==How to Use Datums To Get Print Dimensions== </td> <td width=300> image:vtube-lase...") |
(→Datum Reports) |
||
| (24 intermediate revisions by one user not shown) | |||
| Line 23: | Line 23: | ||
<tr valign=top> | <tr valign=top> | ||
<td width=300> | <td width=300> | ||
| − | This is a sample print with the design intent of checking the width and the height. You can use the VTube-LASER DATUM feature to get to these dimensions</td> | + | This is a sample print with the design intent of checking the width and the height. You can use the VTube-LASER DATUM feature to get to these dimensions.<br><br> |
| + | The diameter of this part is 1.25 inches. You will need to find the X centerline dimension by subtracting 1.25 from 5.5. So - the X dimension should be 5.5 - 1.25 = 4.25.<br><br> | ||
| + | The Y dimension will be 13 inches - which matches the way VTube-LASER dimensions distances from end to end. No conversion needs to made to that value.</td> | ||
<td> | <td> | ||
[[image:sampleprint.png|500px]] | [[image:sampleprint.png|500px]] | ||
| Line 33: | Line 35: | ||
<br><br> | <br><br> | ||
| − | == | + | ==Set the Datum== |
<table cellpadding=10 width=900> | <table cellpadding=10 width=900> | ||
| Line 39: | Line 41: | ||
<tr valign=top> | <tr valign=top> | ||
<td width=300> | <td width=300> | ||
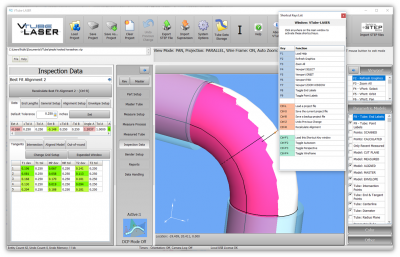
| − | + | Set the datum using the Datum tab in the MASTER DATA menu.<br><br> | |
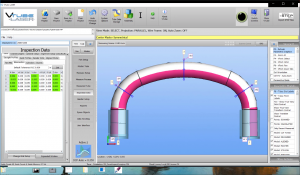
| − | + | It may also be necessary to rotate the master tube into an orientation that is similar to the print. In this case, we used the Transform feature to rotate the master tube so that the first leg is aligned to the Y axis.</td> | |
| − | + | ||
<td> | <td> | ||
| − | + | [[image:set the datum.png|500px]] | |
| + | </td> | ||
</tr> | </tr> | ||
| Line 49: | Line 51: | ||
<br><br> | <br><br> | ||
| − | + | ==Datum Reports== | |
| − | == | + | |
<table cellpadding=10 width=900> | <table cellpadding=10 width=900> | ||
| Line 56: | Line 57: | ||
<tr valign=top> | <tr valign=top> | ||
<td width=300> | <td width=300> | ||
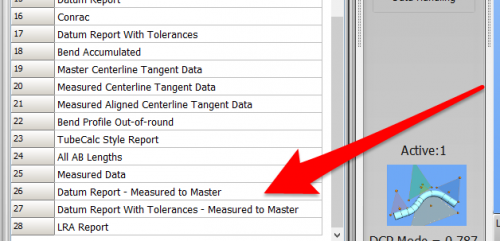
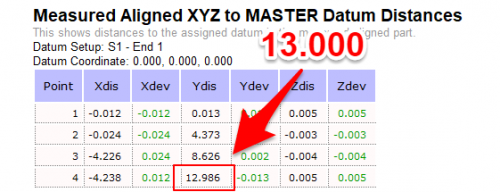
| − | + | After a measure and alignment, use one of the Datum reports in the report menu to show the dimensions.<br><br> | |
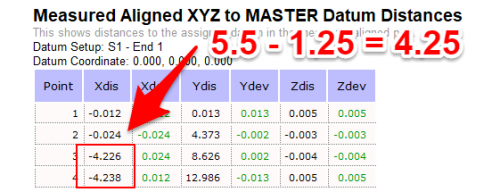
| + | In this example, the two X values show the dimensions that correspond to the 5.5" dimension.<br><br> | ||
| + | The distance values in the report will be distances from the datums that you set in the Datum tab menu in the Master part.<br><br> | ||
| + | For example, if the tube is a perfect shape, then the X3 and X4 distances should be "4.25" (either positive or negative depending on your master tube's orientation in VTube.) In this example, the X3 value is short by 0.023" along the X-axis. Since the Xdev (deviation) number is green, it is within the tolerance that was previously set in the Inspection menu.<br><br> | ||
| + | The tolerances are set in the Inspection Menu / Data / Straight Profiles / Intersection menu. See the video: <br><br> | ||
| + | |||
| + | [[image:VTube-LASER_Videos_XYZIntToleranceVideo.png|300px]]<br><br> | ||
| + | View the [https://www.advancedtubular.com/vtube-laser/20220618_HowToChangeXYZIntTolerances.mp4 MP4 video] | ||
| + | |||
| + | |||
| + | |||
| + | </td> | ||
<td> | <td> | ||
| − | [[image: | + | [[image:datumreporttemplate.png|500px]]<br><br> |
| + | [[image:datumreport1.png|500px]]<br><br> | ||
| + | [[image:datumreport2.png|500px]]<br><br> | ||
</td> | </td> | ||
</tr> | </tr> | ||
Latest revision as of 14:47, 18 June 2022
|
How to Use Datums To Get Print Dimensions |
Sample Print
|
This is a sample print with the design intent of checking the width and the height. You can use the VTube-LASER DATUM feature to get to these dimensions. |
Set the Datum
|
Set the datum using the Datum tab in the MASTER DATA menu. |
Datum Reports
|
After a measure and alignment, use one of the Datum reports in the report menu to show the dimensions.
|
Other Pages
- Back to VTube-LASER

