Difference between revisions of "VTube STAR SVNet Bender Communications"
(→200px How to SEND NEW Data to the STAR Control from VTube-STEP) |
(→STEP 3 - The SEND to BENDER Complete Window) |
||
| Line 282: | Line 282: | ||
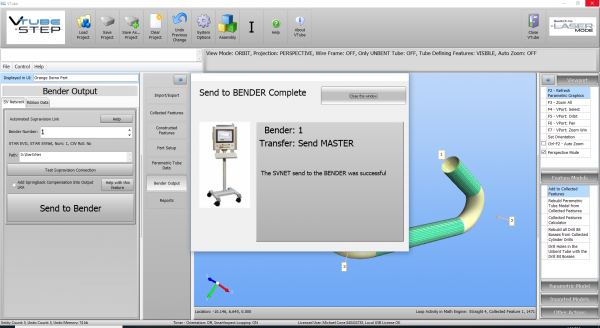
You can allow this window to close on its own in a few seconds, or press the close button to close it immediately. | You can allow this window to close on its own in a few seconds, or press the close button to close it immediately. | ||
<td> | <td> | ||
| − | [[image:vtl_v2.9.11 STAR Send | + | [[image:vtl_v2.9.11 STAR Send New Complete.png|600px]]<br><br> |
</td> | </td> | ||
</tr> | </tr> | ||
Revision as of 20:28, 23 July 2018
|
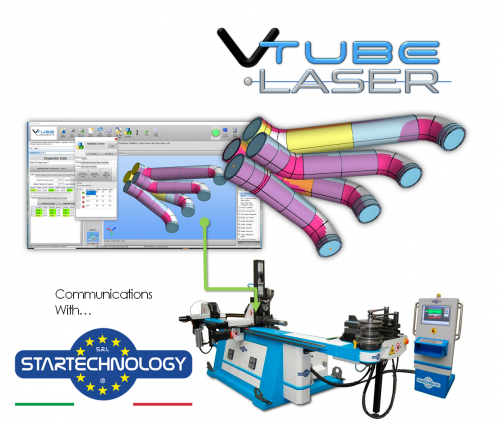
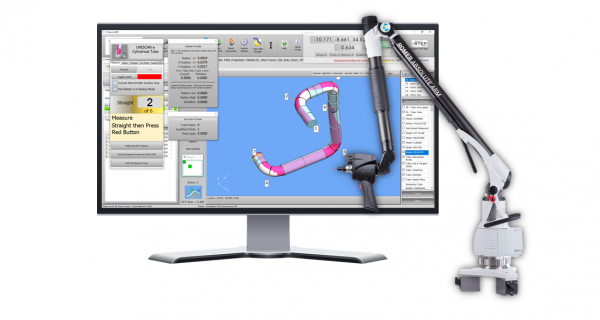
This page describes the use of the VTube-STEP and VTube-LASER to STAR bender new data setup and corrections using the STAR SVNet protocol. |
Back to VTube-LASER
Network Protocol
|
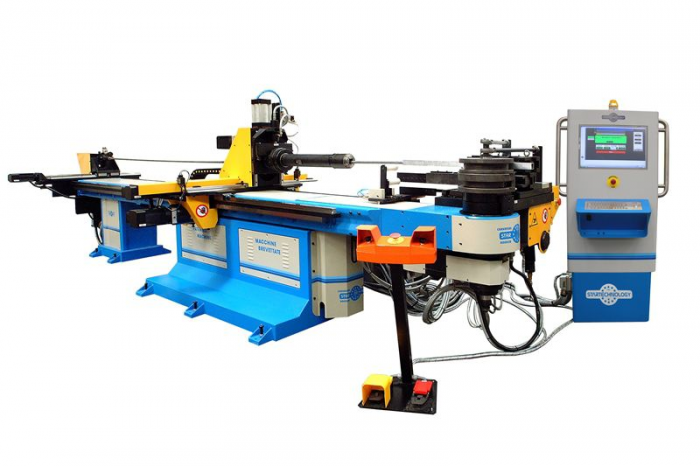
VTube-STEP and VTube-LASER use a modified Supravision Network protocol to send new part data and bender part corrections to STAR EVO benders. |
STAR SVNet Data Protocol Information
These are important facts to know about this protocol.
|
BENDERLINK SETUP STEPS FOR VTUBE-LASER
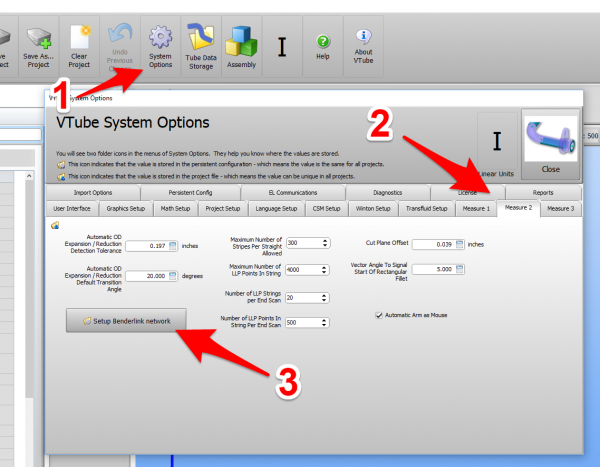
STEP 1: Enter the SYSTEM OPTIONS Menu in VTube
|
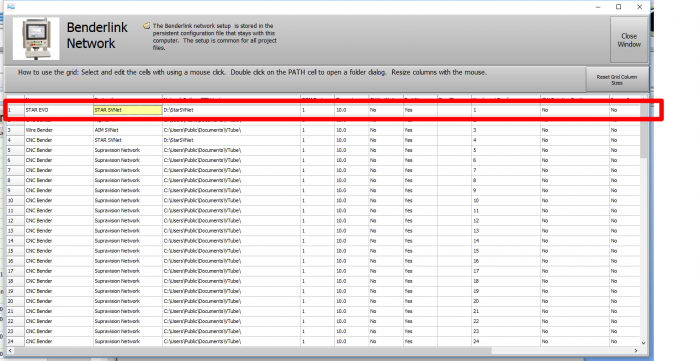
STEP 2: Setup the Benderlink Network Grid for STAR SVNet Protocol
|
 How to SEND CORRECTION Data to the STAR Control from VTube-LASER
STEP 1 - Bend the Tube
|
Bend the tube in the STAR bender. |
STEP 2 - Measure the tube with VTube-LASER
|
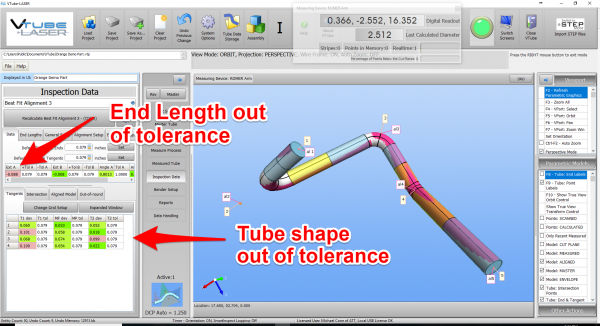
Measure and align the tube to determine if it qualifies by falling within the envelope tolerance for the tube shape. |
STEP 3 - Enter BENDER SETUP
|
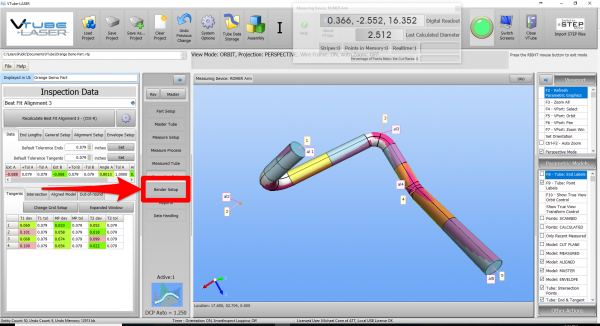
Click on the BENDER SETUP button in the Navigation Pane. |
STEP 4 - Choose the BENDER NUMBER
|
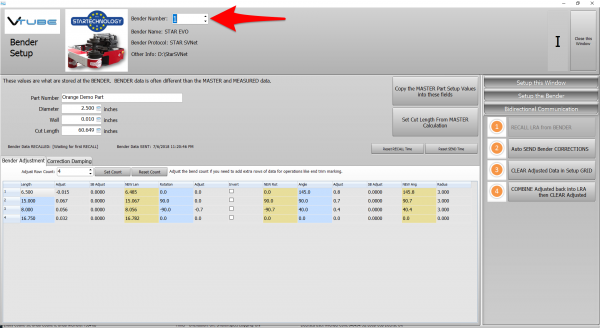
Set the correct bender number at the top of the window. |
STEP 5 - COPY the Data from VTube-LASER's Main Memory
|
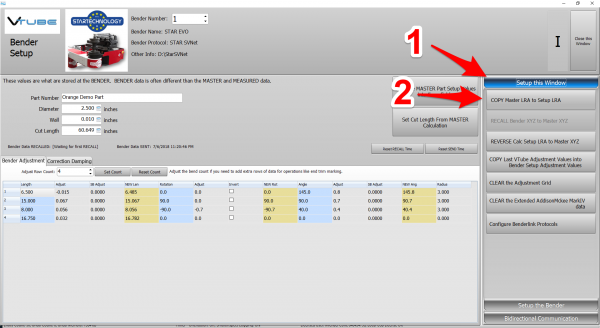
If this is the first correction, then the Bender Setup screen may show no data. If this is the case, then it is necessary to update the Bender Setup screen from VTube-LASER's main memory like this:
|
STEP 6 - OPTIONAL STEP - You Can Manually Change the ADJUSTMENT Values
|
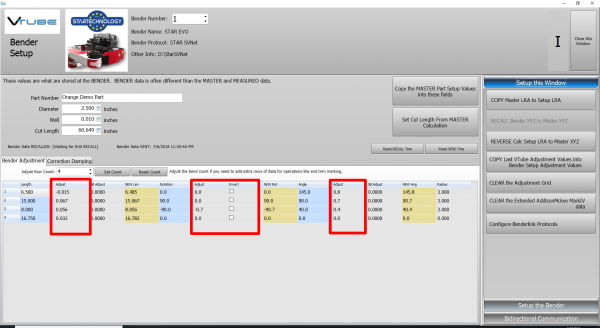
You can manually change the ADJUSTMENT values before sending corrections if you want to. Some users like to set the first and last Length adjustment to zero in order to keep the start position of the carriage in the same place - for when they have extra length on the ends. |
STEP 7 - Send Corrections to the STAR
|
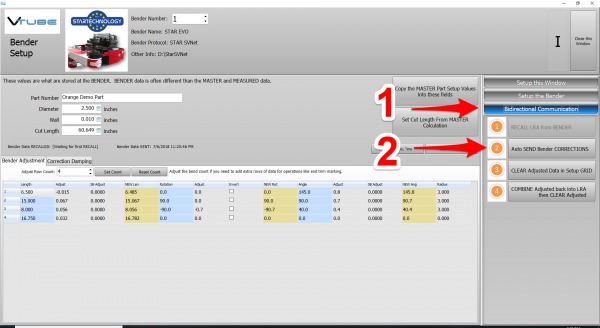
Press "Auto SEND Bender CORRECTIONS" to send the orange column data to the bender. |
STEP 8 - Confirm that the Blue Column Data is Correct
|
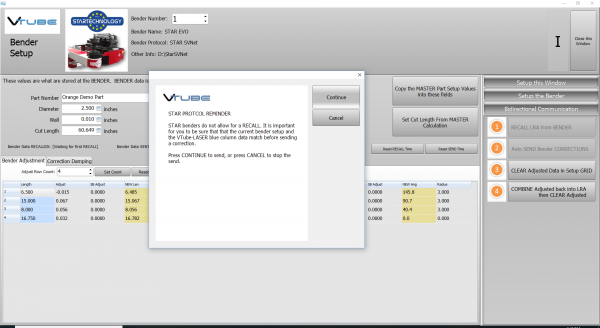
VTube-LASER will ask you to confirm that the original blue-column data matches the data in the STAR bender. |
STEP 9 - The SEND to BENDER Complete Window
|
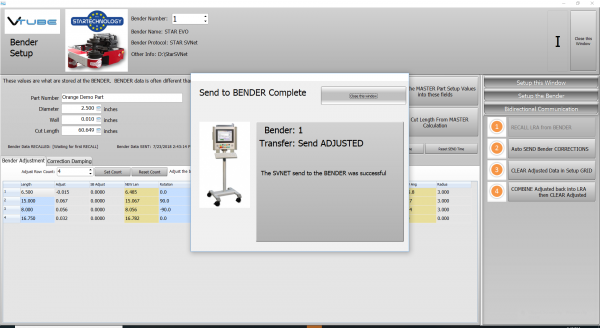
A window should appear for a few seconds indicating that the send to the Bender is complete. |
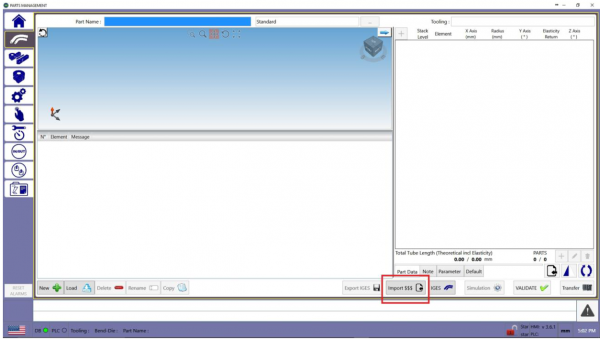
STEP 10 - IMPORT the Correction Data at the STAR Control
|
Move to the STAR control and import the file using the steps in the import document from STAR TECHNOLOGY: STAR Import Supravision File Steps File (PDF) In this example, the file to import is the SVFILE01.S2B file created by VTube. The number in the file will match the bender number. |
STEP 11 - REPEAT STEPS 1 THROUGH 10
|
Bend the corrected tube starting in Step 1, then measure it again (Step 2) and follow the rest of the steps until the part is within tolerance. |
 How to SEND NEW Data to the STAR Control from VTube-STEP
VTube-STEP is used for sending NEW bender setup data to the STAR bender. You can import solid model data (STEP or IGES), or manually enter centerline coordinates or bender data.
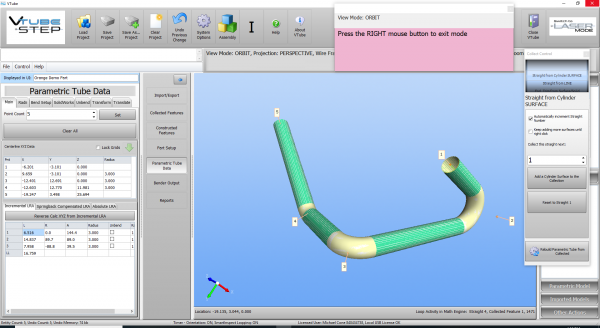
STEP 1 - Import the Tube
|
Import the nominal tube data into VTube-STEP using the VTube-STEP model collection process. |
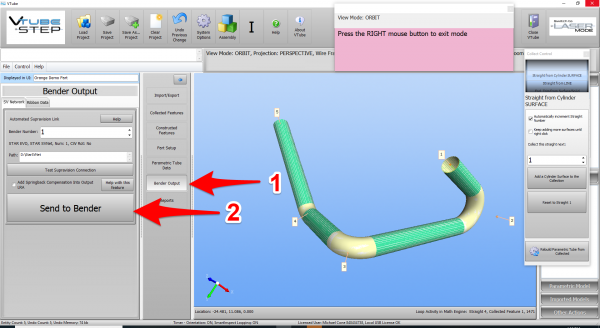
STEP 2 - Send the Data to the Bender
|
Use the Bender Setup menu to send the data to the bender. |
STEP 3 - The SEND to BENDER Complete Window
|
A window should appear for a few seconds indicating that the send to the Bender is complete. |
STEP 10 - IMPORT the Correction Data at the STAR Control
|
Move to the STAR control and import the file using the steps in the import document from STAR TECHNOLOGY: STAR Import Supravision File Steps File (PDF) In this example, the file to import is the SVFILE01.S2B file created by VTube. The number in the file will match the bender number. |
STEP 11 - REPEAT STEPS 1 THROUGH 10
|
Bend the corrected tube starting in Step 1, then measure it again (Step 2) and follow the rest of the steps until the part is within tolerance. |
Other Pages
- See VTube-LASER
- See VTube-STEP
- See UNISON for information on UNISON benders


