|
|
| Line 168: |
Line 168: |
| | <td width=300> | | <td width=300> |
| | Set the correct bender number at the top of the window.<br><br> | | Set the correct bender number at the top of the window.<br><br> |
| − | You can select up to 100 different benders. As of version 2.7, the CRIPPA MPF option is available - which means you should see a CRIPPA bender at the top left corner of the screen. (This step assumes that you have already configured VTube's Benderlink in the Systems Options as described above.) | + | You can select up to 100 different benders.<br><br>As of version 2.7, the CRIPPA MPF option is available - which means you should see a CRIPPA bender at the top left corner of the screen. (This step assumes that you have already configured VTube's Benderlink in the Systems Options as described in the previous VTube-STEP section.) |
| | </td> | | </td> |
| | <td> | | <td> |
Revision as of 16:15, 6 December 2016
About this Page
|
This page describes the setup and use of the VTube to CRIPPA MPF file communications for older CRIPPA benders that do not have the SVNET protocol.
|
|
Protocol
|
VTube-STEP can build CRIPPA MPF files that can be loaded into CRIPPA controls
VTube-LASER, can build and correct data in CRIPPA MPF files for bender corrections.
|
500px
|
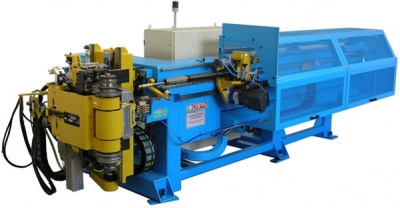
Communications Setup at the CRIPPA Bender
- Connect the CRIPPA bender to the network using a standard Ethernet cable.
- Setup the data folders so that they are a shared network location on your network. These folders will contain MPF files.
|
|
Setup Benderlink at VTube-STEP or VTube-LASER
Entering Benderlink Setup
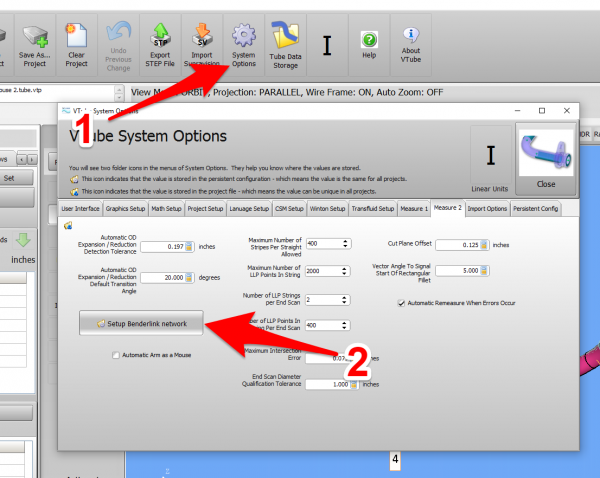
- Enter the VTube System Options menu.
- Enter the Measure 2 tab menu.
- Enter the Setup Benderlink Network menu.
|
|
Setup the Benderlink Network Grid for the CRIPPA MPF Bender
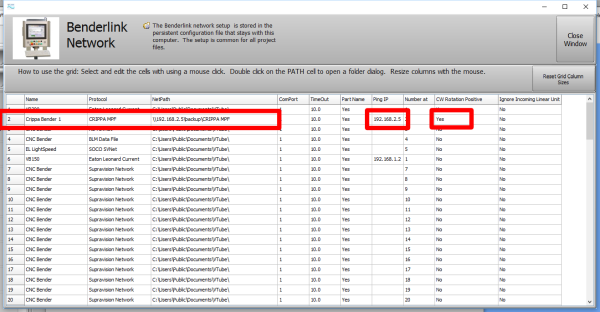
- Choose an unused row in the grid for a new CRIPPA bender setup. (Click on the image at the right to see a zoomed image.)
- Assign a bender name that will help operators identify which bender this is. This text will be displayed at the top of the Bender Setup menu.
- Assign the CRIPPA MPF protocol.
- Enter the path to the shared drive or folder in the NetPath field. This path should point to the folder that contains either MPF files or folders of MPF files at the CRIPPA bender. VTube accepts UNC names as well as regular paths with drive letters.
- Enter the IP address in the PING IP ADDRESS field if it is a fixed field. (This is not required. It allows VTube to ping the address to see if the network location is active before trying to open communications.)
- If the Crippa rotates the Clockwise positive, then select YES in the CW Rotation Positive cell.
- Press Close to save the settings. VTube will save these values to a persistent configuration file that will not change unless you change them in this grid.
|
|
How to SEND MASTER XYZ Data to the CRIPPA Control from VTube-STEP
You can import data or models into VTube-STEP then send the calculated LRA bender data to the CRIPPA bender using the VTube EXPORT menu.
|
In the EXPORT menu, click on the CRIPPA MPF button.
|
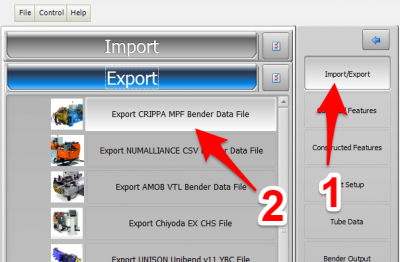
|
STEP 2 - BUILD the File
|
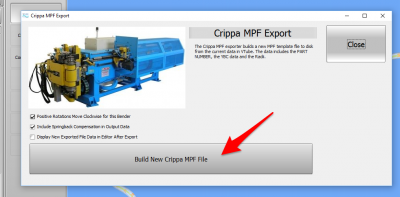
Set the check boxes for the options you want to use, then press Build New Crippa MPF File.
|
|
STEP 3 - SETUP the Network Path
|
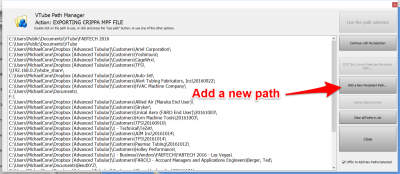
If the path to the bender is not in the Path Manager list, then you can Add a New Persistent Path to find the path to the bender. If it is in the list, then double click on that path.
|
|
STEP 4 - Choose a New SAVE File Name
|
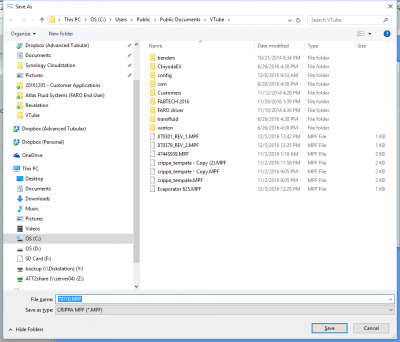
Choose the new part name to create in the Save File dialog. Press the SAVE button. |
|
STEP 5 - LOAD the MPF File at the CRIPPA Control
|
At the CRIPPA control, open the new MPF file. |

|
How to SEND MASTER LRA Data to the CRIPPA Control from VTube-LASER
|
You can also send the new LRA data from the VTube-LASER BENDER SETUP menu to the CRIPPA bender using the VTube Bender Output menu.
|
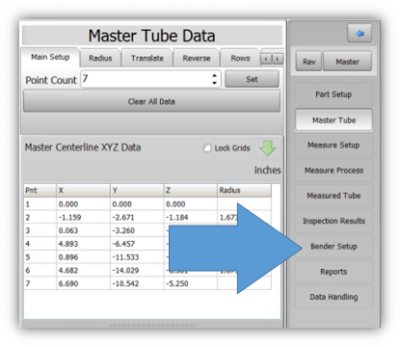
Press the "BENDER SETUP button in the Navigation Pane.
|
|
STEP 2 - Choose the BENDER NUMBER
|
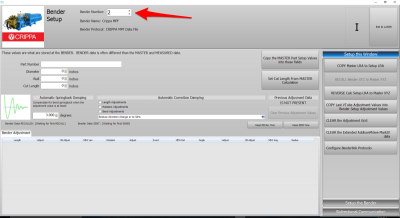
Set the correct bender number at the top of the window.
You can select up to 100 different benders.
As of version 2.7, the CRIPPA MPF option is available - which means you should see a CRIPPA bender at the top left corner of the screen. (This step assumes that you have already configured VTube's Benderlink in the Systems Options as described in the previous VTube-STEP section.)
|
|
STEP 3 - Setup the Bender Setup Data in this WINDOW
|
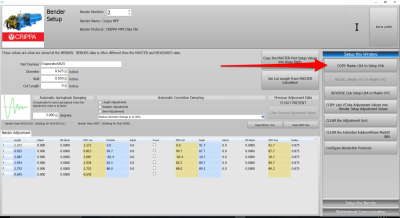
This is for first-time setup for a new part. This ensures that the correct data is sent to the CRIPPA. Data in this window is separate from data in the main VTube-LASER window, so it is necessary to bring data into this window when performing first-time setup of a part.
- Click on "Setup this Window" in the expanding menu on the right.
- Click on copy MASTER LRA to SETUP LRA.
- Be sure every field in the top panel has data that you want to send to the CRIPPA. The MPF file will contain everything in that panel except for the WALL THICKNESS.
- The blue columns below will be converted to new YBC data at the bender.
- The radius column should contain the correct bend radii. This column will also be sent to the CRIPPA.
|
|
STEP 3 - Send data to the CRIPPA BENDER
|
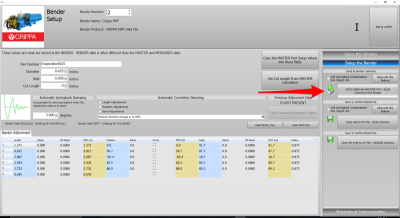
This step will send new YBC data to a CRIPPA MPF File.
- Click on "AUTO SEND the MASTER XYZ + BLUE Columns to the Bender". (For this protocol, the XYZ data is not sent. The CRIPPA file only contains LRA data converted to YBC data.)
|
|
STEP 4 - LOAD the new MPF File at the CRIPPA Control
|
At the CRIPPA control, open the new MPF file. |

|
How to SEND CORRECTION Data to the SOCO Control from VTube-LASER
At the SOCO Control
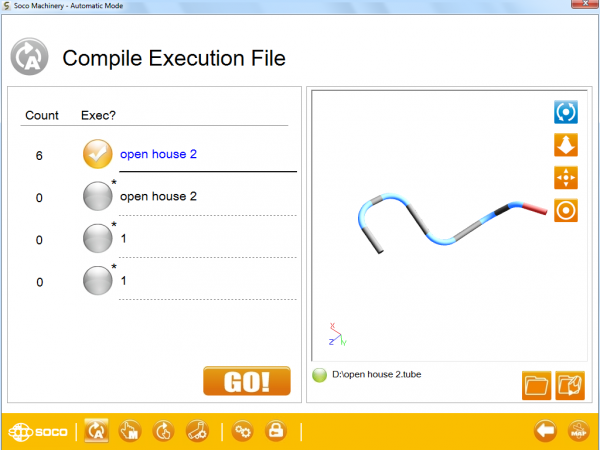
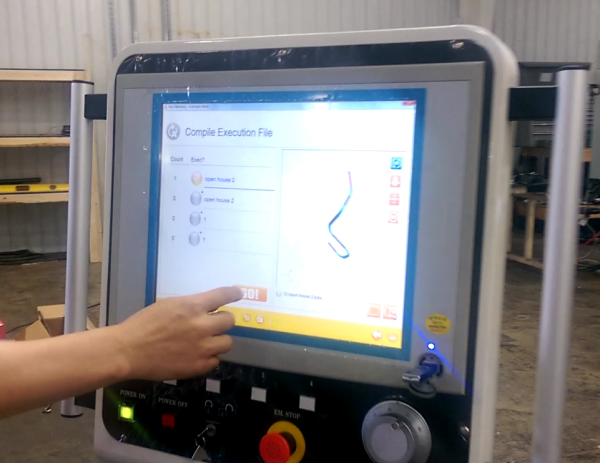
At the SOCO control, setup and bend the first tube through the YBC and then Compile Execution screen.
|
|
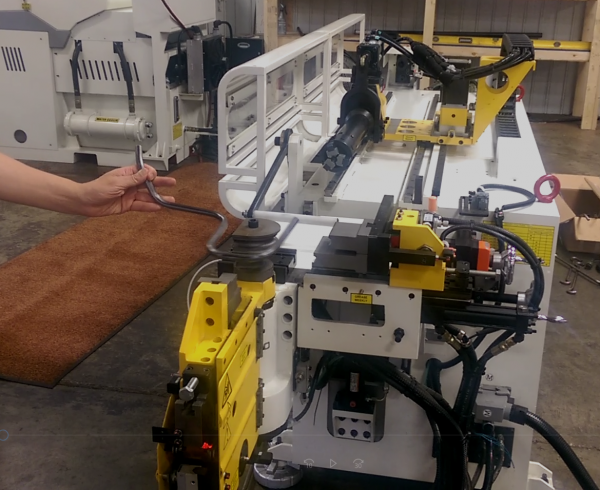
After Bending the Tube
After the bending cycle is complete, remove the tube from the dies. Leave the bender in AUTO mode.
|
|
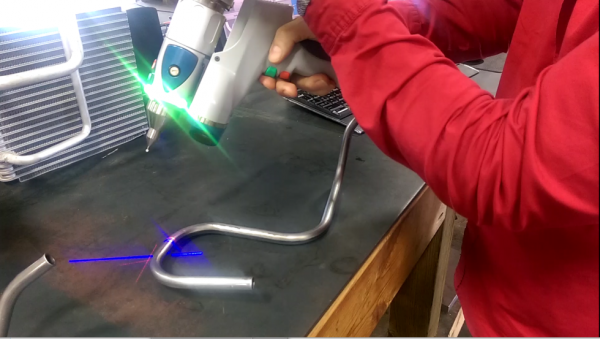
Measure the tube with VTube-LASER
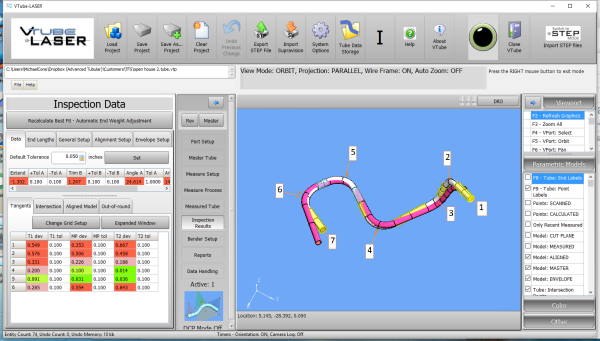
Measure and align the tube to determine if it qualifies by falling within the envelope tolerance for the tube shape.
In the VTube-LASER screen shot, you see the actual result of the first tube not qualifying in shape. The red cells in the tangent point grid on the lower left show that the measured tube centerline is out-of-tolerance.
|
|
Correct the SOCO with VTube-LASER - Enter BENDER SETUP
Follow these steps in the VTube-LASER:
Press the "BENDER SETUP button in the Navigation Pane.
|

|
RECALL SOCO YBC data and then SEND CORRECTIONS
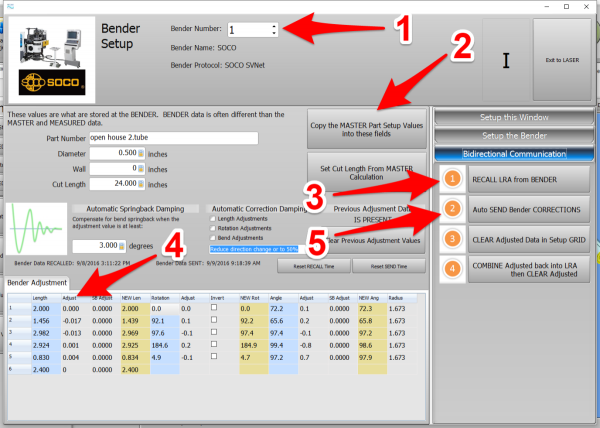
STEP 1 - Set the correct bender number at the top of the window. As of version 2.7, the SOCO SVNet option is available - which means you should see a SOCO bender at the top left corner of the screen.
STEP 2 - If the Part Number is empty, then press the Copy the Master Part Setup values.
STEP 3 - Click on RECALL. This will update the BLUE columns in the Bender Setup.
STEP 4 - You can manually change the ADJUSTMENT values before sending corrections. In this case, we set the first and last Length adjustment to zero in order to keep the start position of the carriage in the same place.
STEP 5 - Click on AUTO SEND. This will send the ORANGE columns to the SOCO bender.
|
|
At the SOCO Bender - Press GO!
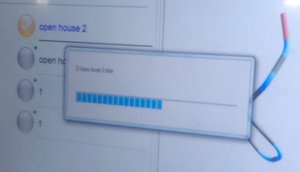
Press GO! The SOCO will compile the changes.
You will see a progress bar after you press GO!
|
|
|
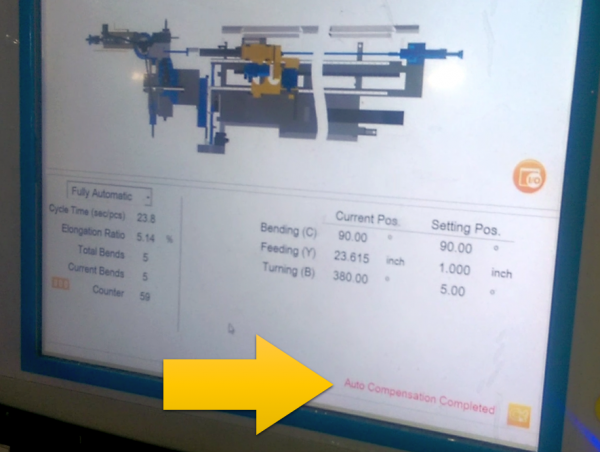
The "Auto Compensation Completed" message will appear in the lower right corner.
Bend the corrected part now.
|
|
Measure at the VTube-LASER Computer
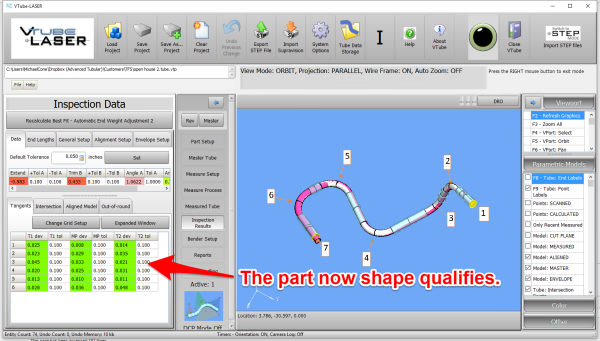
Measure and align the tube again to determine if it qualifies by falling within the envelope tolerance for the tube shape.
This screen shot shows an actual resulting change after the correction.
|
|
Other Pages
|


