Difference between revisions of "VTube-LASER v2.8"
(→Other Pages) |
(→25px NEW: ADDED 3 NEW CYLINDER FIT CHECKS) |
||
| Line 52: | Line 52: | ||
<br><br> | <br><br> | ||
<br><br> | <br><br> | ||
| − | Read details about the four checks here: [[DCF - Dual Cylinder Fit]] | + | '''Read details about the four checks here: [[DCF - Dual Cylinder Fit]]''' |
<td> | <td> | ||
</td> | </td> | ||
Revision as of 02:13, 23 April 2017
|
Revision 2.8Original Release Date: April 19, 2017
|
BUILD 44 - April 11, 2017
 NEW: UNISCAN DCF (DUAL CYLINDER FIT) Feature
|
DCF is the major enhancement for VTube-LASER in this version because it replicates measuring the tube TWICE in one pass without the user noticing. |
 NEW: ADDED 3 NEW CYLINDER FIT CHECKS
|
This window reports cylinder fit values that help you know if the cylinder measurement is good. |
 NEW: CYLINDER FIT WINDOW is NOW COLOR-CODED
|
The window is now color-coded to help you quickly determine where the problem lies in the data.
RED PANELThis would indicate a major problem in the cylinder fit calculation. VTube requires a remeasure of a straight section. |
GREEN PANELAll green indicates that no issues were found in all four checks. You can trust the calculation. |
Intersection Pass Distance Warning TestThis is an example of the Intersection Pass Distance warning test. |
 NEW: Automatic ORBIT to TRUE VIEW of MEASURED CYLINDERS
|
We teach users to view the end scan on the screen before moving to the step. In previous versions, this required that you manually orbit the viewport so that you can see the end scans. From this version forward, VTube automatically orbits every straight TRUE to the screen so that you don't have to use the mouse to find that orientation. |
 NEW: CONFIGURE CYLINDER FIT TOLERANCES ON-THE-FLY
|
Users can now easily configure cylinder fit tolerances on-the-fly. |
 NEW: ADDED CYLINDER FIT QUALIFICATION VALUES
| This a new group of qualification values in the Measure 1 tab menu of System Options. Most of these values are new to the VTube-LASER project file storage. |
 NEW: Point Labels for All Models
| This version now shows point labels for all models drawn on the screen. |
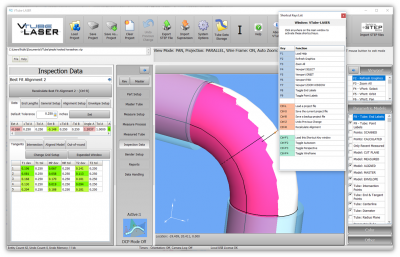
 NEW: ORBIT CONTROL Window
|
This window lets you find any true or normal orientation for any line or bend in any model.
|
 NEW: TRUE VIEW TRANSFORM Window
|
This window lets you transform the orientation of any straight or bend in any model to true to the XY plane. |
 NEW: Redesigned Parametric Display Options Window
| The Parametric Display Options Window has been redesigned to include model colors and easier to use controls. |
 NEW: Import TUBE DATA from ROMER CIMCORE DOCS .DS FILES
| Import DOCS tube data in VTube-STEP mode. |
 NEW: PRECISION WEIGHT CONTROL Alignment
|
Customers asked for additional control for the weighting that is easier to use than 321 Plane-Line-Point. This is the answer to that request. We've added PRECISION WEIGHT CONTROL alignment that allows you to completely turn off certain sections of the tube for alignment or give emphasis to any section just by setting weights from 0 to 1000. |
| This shows emphasis given to end B. |
| This shows emphasis given to the middle straight. |
BUILD 20 - March 14, 2017
 NEW: MantisHub Web Server Bug Tracking
|
This version of VTube will allow you to choose to report software errors directly to our account at MantisHub.
|
BUILD 11 - February 15, 2017
 NEW: "Default Tolerance Ends" Value
|
The Default Tolerance Ends value is in the Inspection Data menu.
|
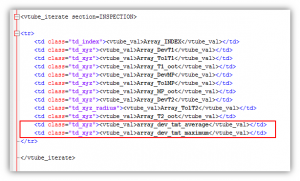
 NEW: REPORT COMMANDS - Tangent Deviation AVERAGE and MAXIMUM Values
BUILD 19 - February 22, 2017
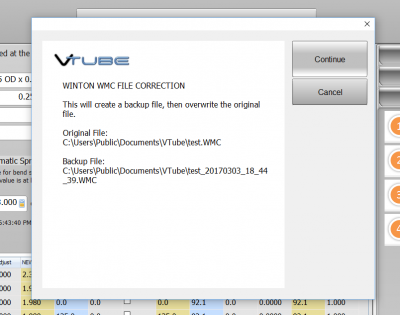
 ENHANCED: Winton WMC Communications Improvement
New Process Flow for Winton WMC CorrectionThis image shows the overall process for correction of Winton WMC files.
|
 UPDATED: Japanese Translation for User Interface
|
The Japanese translation of the UI was updated from version 2.6.
|
Other Pages
- Back to VTube-LASER
- Back to VTube Software Updates (for LASER Mode)
- See also VTube-STEP
- See also VTube-STEP Revisions
- See VTube-LASER Customer Support Page to download the latest version.
- See the tutorial on DCF - Dual Cylinder Fit
- See the tutorial on DCP - Diameter Cut Planes
- See VTube-LASER Cut Planes
- See How to Measure Tubes Attached to an Evaporator with the DCP Feature


