Difference between revisions of "Recommended VTube-LASER Laser Scanner Settings"
(→STEP 3) |
(→STEP 3) |
||
| Line 53: | Line 53: | ||
(For chrome and dark material colors, it can be helpful to switch to Automatic - HDR.)</td> | (For chrome and dark material colors, it can be helpful to switch to Automatic - HDR.)</td> | ||
<td> | <td> | ||
| − | [[image:vtube-laser_v2.2_farol_llp_scan_algorithm.png| | + | [[image:vtube-laser_v2.2_farol_llp_scan_algorithm.png|500px]] |
</td> | </td> | ||
</tr> | </tr> | ||
Revision as of 19:27, 25 December 2015
|
Ideal Setup for HD Scanner in VTube-LASER
The HD blue line scanner has increased capabilities in point density that causes us to recommend some unique settings in FARO scanner setup. These settings work very well in VTube-LASER.
You must be connected to a FARO arm to perform these steps.
STEP 1In VTube-LASER window click on Scanner Algorithm label above the viewport window. |
|
STEP 2Set the Scan Rates to 1/1.
Set the Scan Density to 1/16
Since VTube-LASER removes some of points with a Maximum Number of Points Allowed in Cylinder Laser Stripe filter, it works faster if the FARO driver removes some of those points in advance. Both scanning and calculation can be many times faster when the Scan Density is reduced to anything less than 1/1. |
|
STEP 3For most materials set the Algorithm to Automatic - Normal. |
|
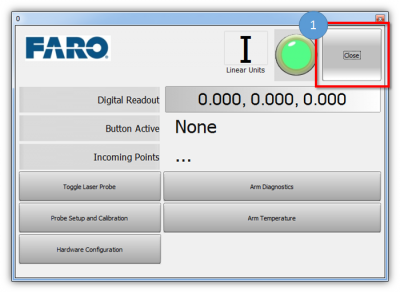
STEP 4Press the Close button in the FARO Arm Utilities window. |
|
STEP 5Observe that the new ball probe selection will appear in the Arm grid. |
Other Pages
- Back to the VTube-LASER page


