|
|
| Line 34: |
Line 34: |
| | </td> | | </td> |
| | <td> | | <td> |
| − | [[image:bendpro-g2-utilities-menu.jpg|300px]]<br> | + | [[image:bendpro-g2-utilities-menu.jpg|400px]]<br><br> |
| − | [[image:bendpro-g2-measuringmachinesettings.jpg|300px]] | + | [[image:bendpro-g2-measuringmachinesettings.jpg|400px]] |
| | </td> | | </td> |
| | </tr> | | </tr> |
Revision as of 16:10, 9 October 2013
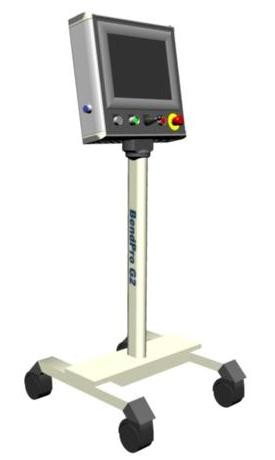
BendPro is a popular bender software package used by multiple bender OEMs in the industry. There are two versions commonly used: G1 and G2
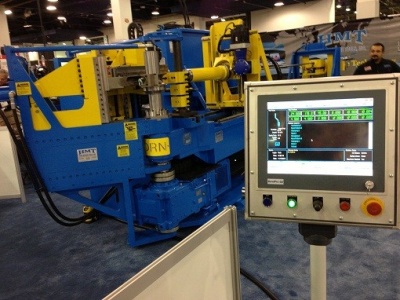
This is a BendPro G2 control on a Horn bender.
About BendPro Measuring Center Communications
BendPro uses Supravision Network communications as a standard for communications. Communications are straight-forward, efficient, and very fast.
The BendPro can be setup to communicate with:
How to Check if Communications is Possible
G2 Version
|
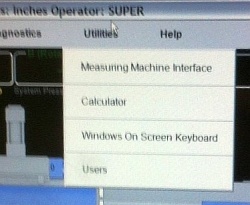
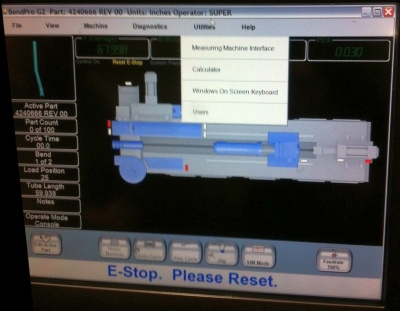
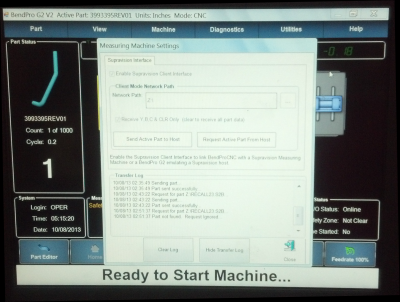
The Supravision link is sold by Current Tech as an option. It's important to verify that this option is switched on when discovering if a BendPro G2 is ready for communication. Click on the Utilities pulldown menu, then click on the Measuring Machine Interface option.
If you see the Measuring Machine Settings menu will allow you to enable the Supravision Client Interface, then your bender has communication capability.
|

|
G1 Version
|
Verify that this option is switched on when discovering if a BendPro G1 is ready for communication. Click on Edit Menu button, then click on the button with the measuring center on it.
If you see the BendPro to Supravision Link window then your software has communication capability.
|

|
Communications Notes for the G2
G2 Version Communications Setup
- Enter the Utilities / Measuring Machine Settings menu.
- Put a check in the checkbox to enable communications.
- Setup the path that Supravision Network will use for communications.
- Use the Machine Parameters / General Options to setup the correct bender number.
- The G2 user interface does not need to be in the Measuring Center menu to communicate. However, that menu includes a log that displays the time of the last data transmission. If there are errors, then this is where they will be listed. So it is beneficial to change to that menu before communications.
|
|
G2 Version Communications Rules
|
The following rules apply for communication using the Supravision Network protocol:
- To correct an existing part in the bender, the part must be saved in the BendPro database, and must be the active part.
- The part number must have no spaces. The G2 controls will parse the part number so that all letters after the first space are deleted. For example: "01234 REV0" will be trimmed to "01234". If this new part number does not exist, then the G2 control will ask if you want to import a new part.
- Changing the first straight length will also change the START position for the first bend.
If you are using VTube-LASER to correct the bender, and don't want the first or the last straight lengths to change, then manually set the first adjustment to zero in the Bender Setup menu before sending a correction.
|
|
Communications Notes for the G1
G1 Version Communications Setup
- Press Edit Part.
- Press the Measuring Machine button to enter the Supravision Network screen (see the image on the right).
- Put a check in the checkbox to enable communications.
- Setup the path that Supravision Network will use for communications.
- Use the Machine Parameters / General Options to setup the correct bender number.
|

|
G1 Version Communications Rules
|
The following rules apply for communication using the Supravision Network protocol:
- Unlike the G2 user interface, the G1 user interface needs to be displaying the Supravison menu during communications. The menu includes a single line that displays if communications works.
- During a send from the measuring center to the bender it is necessary for the operator to walk out to the bender and press the RECEIVE PART DATA button. If there are errors, then this is where they will be listed. So it is beneficial to change to that menu before communications.
- To correct an existing part in the bender, the part must be saved in the BendPro database, and must be the active part.
- Unlike the G2, the G1 can have spaces in the part number.
- Changing the first straight length will also change the START position for the first bend.
If you are using VTube-LASER to correct the bender, and don't want the first or the last straight lengths to change, then manually set the first adjustment to zero in the Bender Setup menu before sending a correction.
|
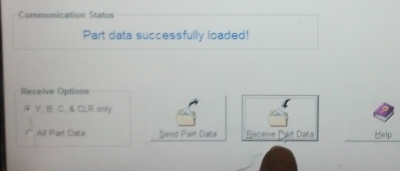
This image shows the message after the part has been received:

This image shows the message after the part has been received:
|
Other
