Difference between revisions of "Change the Machine Length"
From ATTWiki
(→Steps to Change the Machine Length) |
(→Changing the Machine Length) |
||
| (8 intermediate revisions by one user not shown) | |||
| Line 1: | Line 1: | ||
| − | + | <table> | |
| − | < | + | <tr> |
| − | = | + | <td width=200> |
| − | + | ==Changing the Machine Length== | |
| − | + | *Back to [[CNC Bender]] | |
| − | + | *Back to [[CNC Bender Tutorials]] | |
| − | + | *Back to [[CNC Bender Software Updates]] | |
| + | </td> | ||
| + | <td width=300> | ||
| + | [[image:cncv12procontrol_withteachmode.jpg|300px]]<br> | ||
| + | </td> | ||
| + | <td> | ||
| + | </td> | ||
| + | </tr> | ||
| + | </table> | ||
| + | __NOTOC__ | ||
| Line 64: | Line 73: | ||
<br><br> | <br><br> | ||
| − | = | + | =Other= |
| − | + | *Back to [[CNC Bender]] | |
| − | + | ||
| − | + | ||
Latest revision as of 21:52, 14 January 2013
Changing the Machine Length
|
Follow these steps to change the Machine Length.
|
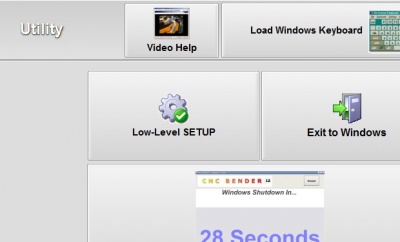
STEP 1 Change to the Utility Menu, and press the Low-Level SETUP button. |
|
|
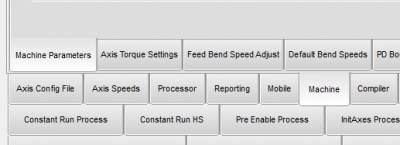
STEP 2 Change to the Machine Tab, then the Machine Parameters tab sub menu. |
|
|
STEP 3 Edit the machine length by touching and changing the machine length edit box. |
|
|
STEP 4 Press the Main Menu button. |
Other
- Back to CNC Bender


