Eaton Leonard Lightspeed Communications Setup

From ATTWiki
Revision as of 01:51, 13 November 2015 by Mcone (Talk | contribs)

Jump to: navigation, search

This document outlines the basic communications setup for a Lightspeed control.

EL Lightspeed.jpg


SVNET Communications Setup Instructions

This is good for use in connecting with our VTube-LASER, VTube-STEP, and Benderlink software packages. All of them are equipped with the Supravision Network protocol.

STEP 1: System Menu and Administrative Control

Change to the Systems menu. If you are not running the operator station as an administrator, then press SECURITY and enter the administrator code. (The default code is "123".)

Press the DEVICE CONFIG button.

EL Lightspeed SystemMode.png

STEP 2: Device Config / Machine Menu

In DEVICE CONFIG, enter the MACHINE menu.

Select a Measure Machine tab. LightSpeed can store four simultaneous measuring center setups for connection to multiple measuring centers.

  • NAME: The name value has no effect on the protocol. However, you can give the setup a name here.

  • PROTOCOL: For communications with our software, select the SupraGauge protocol.

  • BENDER NUMBER: Set the bender to a unique integer number. This is very important if you have multiple benders that share the same network location for transfer of data files.

    The bender number allows each bender to understand if the data files dropped in the shared path are its responsibility or another bender's.

    The original SV protocol can handle bender numbers from 1 to 99. VTube can go higher if necessary.

  • CHECKBOX OPTIONS: Select any of the checkbox options that you want to enable.

    • LOG: To log activity as it occurs

    • METRIC: To make all linear data communicate in Millimeters rather than the default Inches

    • PRESET CLR: To ignore any incoming Centerline Radius data. If you leave this disabled, then you will probably need to setup the CLR after LightSpeed receives a new part file from the measuring center.

  • NETWORK PATH: Set the Network Path to a location on the network that allows read/write access. This is the path where all machines and measuring centers will drop and pickup command files using the Supravision Network protocol.

EL Lightspeed DeviceConfig Machine.png

EL Lightspeed DeviceConfig Machine MeasuringCenterSetup.png


Communications Test on the LightSpeed Side

In order to communicate with the LightSpeed control, it's necessary to switch on remote communications in the control in the user interface.

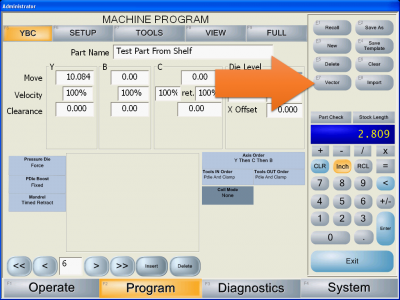
STEP 1: Enter the Vector Menu

Click on the "Vector" button on the right side of the screen.

LightSpeed ProgramScreen VectorButton.png

STEP 2: Allow Network Control

In the VECTOR menu, press the "Allow Network Control" button until it turns orange. (Orange indicates that it is toggled on.)

LightSpeed ProgramScreen AllowNetworkControl.png


STEP 3: SEND a Part from the VTube-LASER

From the measuring center, send a part to the LightSpeed. (This assumes that the connection has been made and that the SVNET protcol is being used, and that the appropriate bender number is used at the measuring center.

The screen on the right shows an example Bender Setup screen in VTube-LASER for communication. To send new data, choose the bender number, enter the "Bender Setup" menu, and press the AUTO SEND button.

Vtube-laser v2.2 bendersetup sendbluecolumns.png


STEP 4: Observe the LightSpeed Communications Status Box

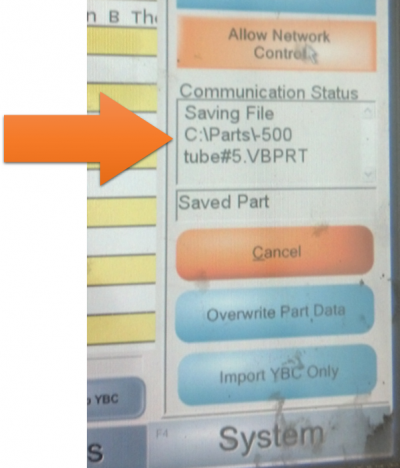
The Communications Status box in the LightSpeed Vector menu should show activity - like that the incoming file was saved.

You will also see the options of Overwriting the part data, or Importing the YBC data only. Overwriting the part data will allow the new data to completely overwrite the part in memory. Pressing the YBC data only will change only the YBC data in memory with the incoming data.

For setting up a new part, you can press overwrite. For corrections you can press YBC data only.

In this test, press Overwrite Part Data.

LightSpeed ProgramScreen ReceivedData.png


STEP 5: Perform a RECALL at the Measuring Center

Change any value in the YBC data. Make the value change easily recognizable for when we recall the data in VTube-LASER.

Now, at VTube-LASER press RECALL. LightSpeed should answer VTube-LASER with the new data in the blue columns.

If the new values are displayed in the blue LRA columns, then the communication was successful.

Vtube-laser v2.2 bendersetup recall lra from bender.png


Other Pages