Difference between revisions of "DCF - Dual Cylinder Fit"
(→How It Works) |
(→How It Works) |
||
| Line 26: | Line 26: | ||
When using the LASER scanner, the UNISCAN DCF feature divides the cylinder surface data into two groups, then calculates the cylinder data and intersection points twice to verify repeatability. (Note that this feature is not used tactile measurements.) | When using the LASER scanner, the UNISCAN DCF feature divides the cylinder surface data into two groups, then calculates the cylinder data and intersection points twice to verify repeatability. (Note that this feature is not used tactile measurements.) | ||
<br><br> | <br><br> | ||
| − | The Point Repeatability value (see | + | The Point Repeatability value (see '''CHECK 4''' below) is reported in the Cylinder Fit window. If this value is too high, then VTube-LASER will warn you. This allows you to remeasure the straight to guarantee that the measure repeats before moving to the next straight.<br><br> |
<td> | <td> | ||
</td> | </td> | ||
Revision as of 23:01, 22 April 2017
Contents |
About the Feature
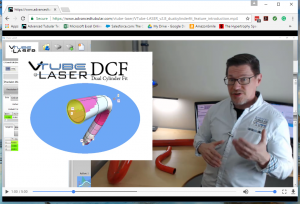
DCF is the major enhancement for VTube-LASER in version 2.8 (April 19, 2017) because it replicates measuring the tube TWICE in one pass without the user noticing.This method helps to ensure repeatability of the cylinder measurements on-the-fly using a LASER scanner.Click on the image below to see the introductory video: |
How It Works
|
When using the LASER scanner, the UNISCAN DCF feature divides the cylinder surface data into two groups, then calculates the cylinder data and intersection points twice to verify repeatability. (Note that this feature is not used tactile measurements.)
|
MULTIPLE LEVELS OF CYLINDER FIT CHECKS
|
As part of the DCF feature, the Cylinder Fit Data window reports cylinder fit values that help you know if the cylinder measurement is good. CHECK 1 - MAXIMUM WOBBLE PREDICTIONThe Maximum Wobble value predicts how precise the surface data fits the cylinder. This was in previous versions, but now two cylinders must pass - not just one. And we've created a single new value to display at the top rather than multiple XY values. CHECK 2 - OD SURFACE TO CENTERLINEThe new OD Surface to Centerline value reports the low and high points on the measured diameter relative to the centerline. If the values get too far from each other (the "Delta"), then VTube-LASER will warn you. Also, the Out-of-round% is reported and used to qualify the cylinder fit. This is active for both LASER and ball probe. CHECK 3 - INTERSECTION PASS DISTANCEThe Intersection Pass Distance shows how near each intersecting 3D centerline comes to each other in 3D space. If the Nearest Pass value is more than the Intersection Error Tolerance, then VTube-LASER will warn you. This is active for both LASER and ball probe. CHECK 4 - DUAL CYLINDER FITAs mentioned above, because the DCF engine creates two cylinders, it always builds and compares the resulting intersection points from both cylinders. It warns you if they don't match well enough. |


